The power of sharing your personal story

A few months ago, Seth Cheeks, who I’ve worked with for a few years at Google shared a podcast interview he had done talking about his journey to becoming a Sr UX Designer at Google. I was very touched. His story was powerful, because it was so personal. His vulnerability helped me better understand his journey, sacrifices, and the curiosity and passion that propelled him to the next thing and the next. 

Listening to Seth’s story made me reflect on my own path and the key learnings I had along the way. I realized how important it is to share our stories with the UX community because our unique stories have the power to inspire and connect us at a deeper level. So, I’m going to share my unique story of how my love for drawing led me to pursue a career in Design, and how my curiosity for learning opened the doors to possibilities I never knew existed.

If you would have told the little girl in Peru who loved drawing that one day she would have the opportunity to work on shaping technology to help users around the world, I would have simply laughed - a dream beyond any dream I could ever have.

As a kid growing up in Lima, Peru, in the 80s when terrorism was at its peak.  I remember blackouts as a regular occurrence because terrorists had bombed another electric power tower, or a nearby residential building, or a car bomb had exploded. We were not allowed to go out freely and play, as kidnappings and robberies were also something to be careful about. That said, my childhood memories were not of being scared.

I remember creating a “blackout kit” which included pencil colors, markers, pens and a notebook. Like I mentioned earlier, drawing was my happy place. I would take my kit out every time there was a blackout and bring it to the kitchen where we all gathered as a family with candles, waiting for power to come back. This kit brought me comfort. I remember drawing instead of hearing the news or worrying about what just happened in the country - drawing was my escape.

I liked to create graphics and patterns more than people or objects. Knowing that I liked to draw so early in my life encouraged me to ask my parents for drawing classes so I could learn better techniques, especially people and animals which I’m still not great at drawing.

Screen Shot 2021-01-04 at 12.00.04 PM.png

When I was about 10yrs old, my older sister told me about her friend who was a Graphic Designer. I was very curious to learn more about it so she took me to her office to see first hand what her friend’s job was like. She had this big desk to design, it had light underneath for accurate tracing, and had lots of colors, markers, paint, and brushes, it was a dream come true. This was a pivotal moment for me. The moment I saw what she was doing, I knew I wanted to do it too.

Screen Shot 2021-01-04 at 12.00.37 PM.png

I’m very fortunate to have parents who supported me even though they had no idea about art, design or the type of jobs I could find. My mom always told me, “study something you love because you’ll be doing that for the rest of your life” she also taught me about the importance of studying something so I can be financially independent. Both are two of the best pieces of advice I got in my life.

I followed her advice and got a degree in Graphic Design. I started working at design studios in Lima doing brand identities for large companies, print and packaging design. I learned a lot about the print design process, I remember reviewing color at 4am at a print shop, ensuring every pixel and color were perfect before mass printing started. 

After working for ~3 years, the internet boom happened. All of a sudden we were designing for the web, without knowing how it worked or how to design for it. The print rules and guidelines didn’t apply completely which made me realize I needed to learn more about this new medium.

Screen Shot 2021-01-04 at 12.00.48 PM.png

My curiosity to learn and my dream of living in the US pushed me to look for graduate programs in the US. But I’m also very shy and close to my family. It was a tough decision to leave home. There were many scary things to think about - the student loan I was taking out, finding a job as a foreigner, being far from home --  all very intimidating thoughts -- but my curiosity to learn was stronger. I pushed myself to try it. I left Lima, Peru for Chicago in 2002 to study a Masters in Human-Centered Design. To be 100% honest, I didn’t know exactly what that meant. UX as a discipline was still in the early stages of becoming an official thing, I put every penny I had into this program and was determined to not let fear hold me back. I was hopeful and excited to learn and experience my dream of living in the US.

When I attended my very first class, I didn’t understand a thing the professor said. It was a 3hr long class and I felt so lost. I thought I made the biggest mistake in my life but I quickly realized I wasn’t alone. There were others who felt the same so we helped each other. I learned the value of teamwork. Every project was team-based. We learned how to collaborate, seek and give constructive feedback, appreciate different POVs and work together to find the best possible solution. This was another important lesson I applied throughout my career.

When I finished my first year, most of my fellow students had internship opportunities across the country. I didn’t. I felt like a failure. I couldn’t afford moving to another place without a paid internship so I stayed in Chicago and found a job at the university designing our internal site. In hindsight, this was an important moment as well, I learned a lot about designing for the web - dynamic resizing, personalized modules, etc - it gave me a good basic understanding of the web and how to leverage its power to create user-centric experiences. The key lesson I learned was don’t take anything for granted – every opportunity can provide knowledge and open up new opportunities.

Screen Shot 2021-01-04 at 12.01.18 PM.png

After graduating I got a job at Microsoft. I knew nothing about the tech world and was super nervous and excited at the same time. The tech jargon was a third language I had to learn. It was a very different world and I had to push myself to not let fear win, instead of being shy and feeling bad for not understanding, I raised my hand and asked questions. Simple questions like “what does that mean?” Surprisingly, people didn’t shame me for asking, it was the complete opposite, they were glad to explain things. Another important lesson - always ask if you don’t understand something, people will gladly explain. In my 17+ years of working in the tech world, I’ve never once been told I’m asking a dumb question (even if it was really dumb!).

I have worked in multiple projects throughout my career at Microsoft and Google, building expertise in applying user-centered methods for very ambiguous problems and pushing a vision forward. Every project was unique, every time we applied the user-centered process it looked different. We had to adapt to changes and challenges. Whether those were due to tech or time constraints, organizational changes, leadership changes, we had to adapt our process. I always tell myself to have a “I can” attitude and figure it out. In the end, the team is the most important part of the equation. As a team you adapt and figure out how to achieve your end goal with a user-first approach. When you work with a cross-functional team that has a  “we can” attitude, it’s easier to adapt and pivot. 

When I think about the skills I’ve learned throughout my career, the most important one is empathy. First and foremost to understand and represent users. What are their desires and needs, what obstacles are impeding their goals, and how can we as a team build better products to help them?

I also used empathy to establish stronger relationships at work. Everyone likes to be included in the decision making process for the product they build. I leveraged empathy to understand different points of view across teams and functions, giving me a deeper understanding of people's motivations and goals, which in turn helps build bridges and find common ground. It helps unite people toward common goals. 

I owe a big part of my growth to all the role models I had throughout my career. Mentors who guided me through difficult situations, gave me honest and clear feedback, pushed and challenged me, championed me and shared their own vulnerability. The key learning is to always look for role models who you can follow and aspire to be.

It’s also very important to believe and trust the leadership of your organization. The person at the top, who is making the final calls, has to be a person you aspire to be and a role model. Without this, it’s very hard to come to work feeling inspired, and like what you do every day is part of something bigger. You need to trust this person and their leadership team to guide the organization toward the best the team can do. The best leaders are the ones who lead by example. Their teams model their behaviors - which in the best teams I’ve had the honor to be part of - created a healthy, open, and inclusive team culture with a “we can” attitude. When you are looking for your next role, make sure you’re aligned with your leadership’s vision. 

These are some of the key learnings I wanted to share with the UX community with the hopes of shedding light on what we all go through personally. Every path is different and unique, and every step offers an important lesson that will lead you to the next thing. I’m very thankful for every lesson I got on the path that took a little girl from Lima, Peru (who found drawing as her happy place) to a UX Manager leading world-class UX teams at Google. My hope is that my story will inspire you to share yours as well, the same way Seth’s story inspired me to share mine.

Thank you!

Online class: Intro to UX, Designing with a User-Centered Approach

Interested in learning about UX? I partnered with @skillshare to create an "Introduction to UX" online class where we walk you through the process of designing with the user centered approach.

User Experience (UX) considers the end to end experience a user has with a product or service, looking at all the different touch points they go through from learning about the product/service to using it, as well as considerations after using the product/service.

Take a look at this link to learn more and use the referral for a free trial on Skillshare. http://skl.sh/cinthya

Tips for starting or growing your career as a UX Designer

As a UX Manager at Google and organizer of XX+UX events in NYC, I often talk to people who are interested in starting or growing their careers in UX Design. It’s an exciting time as the UX discipline has evolved over the years and expanded as new technologies evolve. As a UX Designer who has been working in the tech industry for over 13 years, I wanted to share some of the most common questions I received which hopefully will be useful for more people.

I want to get into UX Design but have little or no experience. How do I get a job without portfolio samples?

The best way to do this is to create your own case studies. Think of problems you would like to solve, maybe it’s something that bugs you in your everyday life, or something you’re passionate about but you never have time to work on. The goal of having a portfolio with case studies is not only to show the work you can do, but to give potential employers a view into who you are as a professional: What is your design process? What kind of things do you consider when working on a project? What is your approach? What is your work style?

Employers want to know who they’re hiring not because you launched product X, but because you would be an invaluable addition to their team.

I have work I can showcase, what is the best way to build a portfolio?

Building a portfolio can get pretty overwhelming so here are some simple steps to help structuring it:

Have one single location to showcase your work. A website, a deck, a PDF, you name it. But please do not share multiple links, folders, or documents. Treat your portfolio as a product that represents “you” as a brand. A good product should be easy to use (i.e. not needing to chase down folders and links to understand what this “product” does) and should be easy to understand, meaning people should know who you are as a professional in the first minute or so.

Present projects as case studies. A case study is a a great way to walk through your thinking and design process.

  1. Set the stage: What is the problem you’re trying to solve? What are the user needs and the opportunity space?

  2. Clearly state your role in the project: What was your contribution? Who did you work with on the project and on each phase of the project?

  3. Walk through your process: This is where you want to showcase your approach to solving a problem. What was that process like? Explain each step of the process, from understanding the problem space to the assumptions you made and why.

  4. Design execution and rationale: It’s important to show quality of the craft (design execution) but it’s also as important to show how you arrived to that solution. Describe the rationale for decisions made which lead you to the final artifact.

  5. Call out lessons learned throughout the process. If it shipped, what would you do as next steps?

Be concise, check your grammar. There’s no need to write at length about every single thing that happened. Write it as if you’re explaining it to your parents. Simple, clear and easy to understand.

Finally, remember that it’s not about the final solution but who are you as a UXer, what kind of professional you are: what is your approach? are you a team player? a good collaborator? Do you have good presentation & communication skills?

Startup, Design Consultancy, Agency, Big company? Where to go?

The good news is UX has become such a strong asset for companies that more industries want to have UX talent within their teams, thus creating many opportunities for UX Designers. When people ask me this I normally respond by asking them what kind of skills and expertise do they want to learn. I’m also interested in learning about their experience to date. By thinking about these things you’ll have a good indication of what type of company and industry would be the best fit for you.

Working at a smaller company (i.e. startup) will help you learn a variety of skills. When working with a smaller team you’ll have to wear many hats and do a bit of everything. This is a great way to see which area you’re most passionate about.

Agencies and Consultancies are great if you are looking to work on a variety of projects. You will learn how to adapt your UX skills and process to a range of industries and user segments.

When working in house at a (bigger) company your role will be more defined. Roles are focused on a specific area of contribution (i.e. UX Design, UX Research, Motion Designer, Visual Designer, etc) mainly because of scale. As a UX Designer working on a product used by millions of people you’re not only designing the UI for one language but for many many languages, you have to ensure it’s accessible, etc. There are many aspects of the product you have to think about therefore the need to have more specific roles.

Seeking advice, Mentoring.

Whether you’re getting started with your career or you are an experienced professional; it’s always useful to seek advice and mentoring as you grow your career. We’re constantly learning new things, from being a strong individual contributor to learning new types of contributions. As your scope expands, you’ll want to learn how to be an effective leader, how to build good team culture, drive for success, etc. All of those were new to me, and I keep learning everyday by seeking advice from peers and mentors.

I like how Ana Roca Castro (@AnaRC) said it at a panel where we met. Find a mentor who is right above you in terms of experience, someone whose steps you can follow. And you should also find a mentor who is much higher level than you. Someone who you aspire to be someday in the future. The types of questions you will have for these mentors are different and are both invaluable. You’ll be surprised how open people are to giving advice and mentoring. Don’t be afraid of asking, you won’t lose anything.

Let go of the “Designer ego”

The first thing I tell people new to the discipline is that we, as Designers need to learn one thing: design is not art. When you work on an artifact that will be used by thousands, millions or billions of people then it’s clearly not art. This artifact (a product, a device, an app, a website, etc) has to be useful, easy to use, work flawlessly and be delightful.

stevejobsquote.png

As Steve Jobs said, “Design is not just what it looks like and feels like. Design is how it works”. It requires multiple people and disciplines to achieve these goals. As a Designer, you have to let go of the idea that you can go away to “your cave” and come back with a showstopper solution. I’ve seen this many times and I’ve learnt this the hard way myself. The best way to come up with a strong solution is to work closely with a multidisciplinary team. A team that brings different perspectives, different expertise and skills. Don’t get upset when someone gives you feedback or a critique, it’s not personal. They are also invested in making that artifact great and want to work with you on achieving that. Focus on building strong relationships with your team members because the success of the product relies on all of you collaborating as team.

Junior vs Senior Designers

A popular topic within conversations. What is the difference between a junior and a senior Designer? Is it years of experience?

I think the answer is not just about years of experience. The main difference I see between junior and senior Designers (or professionals in general) is that a junior person will come to their manager with a problem and ask for help to solve it. A senior person will come with a problem and propose a solution for it. This solution may not be the best or the final one, but the fact that this person is proactive at thinking of solving the problem is what sets this person apart and shows seniority and leadership.

Final thoughts..

Have self awareness of who you are as a professional. Think about your strengths and areas for growth. Visualize where you want to see yourself in 6 months. What are the things you need to do in order to realize that vision? Having a shorter term vision helps track and achieve those goals more efficiently. They’re steps towards your longer term vision.

Always be humble and be willing to do the work needed. Being part of a team of talented and humble people is the best part of working at Google. The incredible talent that surrounds you is humbling. No one is too good to do something. It doesn’t matter what it is. Everyone rolls up their sleeves and do it. To me, that’s the fun part. When you get to do all sorts of things for the success of a project.

Finally, stay focused on the user. It doesn’t matter how much experience you gain as a UX Designer, our main job is to solve user needs.

Hope this helps!

This post is also on Medium (October 13, 2017)

Introduction to UX in spanish (Peru)

Thanks to the US Embassy in Lima I was able to travel back home and share my experiences as UX Designer working at Google. I walked them through the UX process and how we applied it on products like Google Classroom, Expeditions and Blocks.

It was an honor to give this talk to students in high school and universities, and hopefully inspire them to pursue careers in STEAM. In the end, i shared a lot of the things I learned throughout my career  and told them to follow their passion, because that is what opens up opportunities to learn more.

Here is the talk (in spanish) and the video from Cibertec on Facebook live

Talking about UX with "El Comercio"

"El reto más grande para un diseñador es crear algo simple"
(The biggest challenge for a designer is to create something simple)

I had the pleasure to talk with El Comercio,  the main newspaper in Peru about User Experience Design and Research.  I've been living and working in the US for more than 10 years now, witnessing and participating in the evolution of the UX discipline. 

It's great to see how UX is now top of mind not only within Design companies but in any type of company, and in so many countries. I'm excited to see how UX will help shape the next generation of products made in Peru.

Take a look at the online interview

The first 10 months

It’s been a while since I blogged, having a baby and working full time definitely takes all of my time! The saying “having a baby changes your life” is completely true, but I’m not going to write about the life-changing experience part. Instead I’m going to highlight practical things I share when talking to friends who are about to become parents or just became parents.

First 3 months

As described on the DVD/Book “The Happiest baby on the block”, the baby’s first 3 months were more like their 4th trimester. They don’t fit inside you anymore so they have to come out. But they’re still not ready to fully interact with the world. Their brains are not fully developed and they need more stimulation like they had while in the belly.

During the first 3 months, our baby was pretty much sleeping, nursing and pooping. So, I focused on making her environment similar to the one she had when in my belly. The best tips came from the DVD I mentioned above:

  • Shushing sound: You know how people say there should be silence so babies sleep? The reality is bit different. When babies are in the womb, they hear loud rumbling noises all the time from the blood whooshing through the placental arteries. It’s louder than a vacuum cleaner. The shushing sound is close to what they hear inside, so if your little one starts crying, try shushing her/him really close to the ear and you’ll see how it soothes her/him. This is probably the best tip we ever had. We still use this to make our daughter fall back asleep even though she’s way past 3 months now.

  • Hair dryer: If shushing doesn’t work, turn on a hair dryer. I promise your newborn baby will stop crying. We had one right next to our changing table and every time she cried, we turned it on and worked like a charm.

  • Swaddling: I had no idea what this whole swaddling business was all about. But it turned out to be pretty useful. Babies are tight inside your belly and swaddling makes them feel snug, similar to the womb. Our baby slept on the rocker for the first couple of months so instead of swaddling her properly, we made sure the blankets we used were tight around her.

Other useful things are:

Nursing cover

I didn’t think I needed one because I wasn’t thinking of nursing outside my own home. But if you want to have some freedom and go out to places, you definitely want to have a nursing cover. I like this one because it has an open neckline that holds the cover away from you and the baby so you can easily see from the top.


Sterilizer

I didn’t use a sterilizer that often while breastfeeding but it was very handy to sterilize breast pump parts and breastmilk storage bottles. Once I stopped breastfeeding, we use the sterilizer approximately 5 times a day for her bottles. We love the microwavable one. Super easy to use and you can easily “hide” it in the microwave if you don’t have space for it.

To-go sterilizer bags

They are amazing for travelling. All you need is a microwave and you’re good to go!

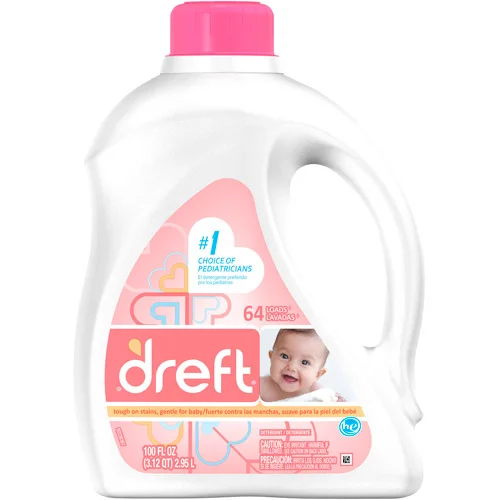
Baby detergent - Dreft

My sister recommended using Dreft which we use until today. It’s mild and perfect for baby clothes.

3 - 6 months:

Sleeping sack swaddle

Once we moved her out of the Firsherprice rocker (she slept in it for the first 3 months!) to the crib, I was afraid she would wake up because she wasn’t snug anymore. We tried the Halo sleeping sacks to swaddle her and it worked out great! It was easy to swaddle her and she slept “like a baby”

Sleeping sack regular

Once she was able to rollover, we switched to a sleepsack without the arms part (regular one). She still uses one now because she moves a lot at night, a blanket would not work at all. This way we’re sure she’s warm throughout the night.

Toys

We didn’t get her any toys before she was born. I guess we were so focused on getting the apartment ready and have all the basics that we forgot about toys. But thanks to our friends and family, we got a great variety of very useful and super cute toys. Thanks to them, we were in pretty good shape for her first few months. Here are a few we had no idea about or didn’t think we really needed which turned out to be her favorites:

Plastic Oball with holes

It’s a simple ball with holes, but has kept her entertained since she was a couple of months old until now. I totally recommend getting one.

Activity gym

We started using the one my cousin gave us as a gift when she was about 2 months old. It was great seeing her stare at the colorful animals hanging above her and slowly trying to grab them. When she grew up a bit more, she was able to play and kick with the piano attached at the bottom. It was great for her to learn how to grab things, look at herself in the little mirror and learn how to kick and make sounds.

Mobile for her crib

Imagine if you’re lying all day long, wouldn’t it be great to have something cool to stare at? I handmade a felt animal mobile which became one of her favorite things. I was so happy she paid attention to it and enjoyed looking at the little animals I made for her. I’m not suggesting you make one, you can buy anyone you like. Your baby will love looking at it when it moves and plays music.

image.jpg

Soft toys with different textures and sounds

You’ve probably heard about this one already. Babies are attracted to different textures (who isn’t?!) so get a couple of toys with different textures and sounds. We got the Skiphop owl as a present and she still plays with it 10 months later!

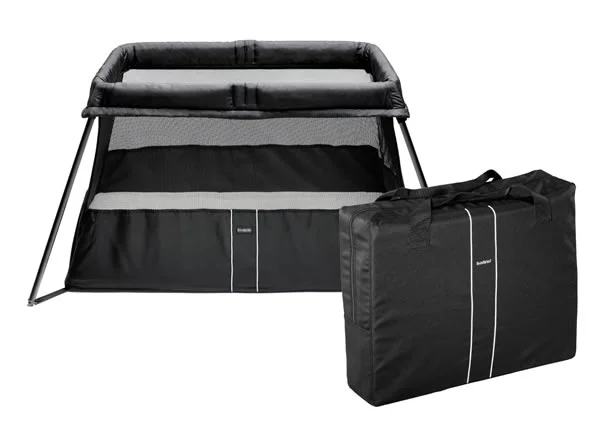
Travel crib

Having a light travel crib was super important because we have taken our daughter on many trips these past few months. The baby bjorn travel crib is awesome. It’s light, easy to set up and folds into a compact square the size of a carry on bag.

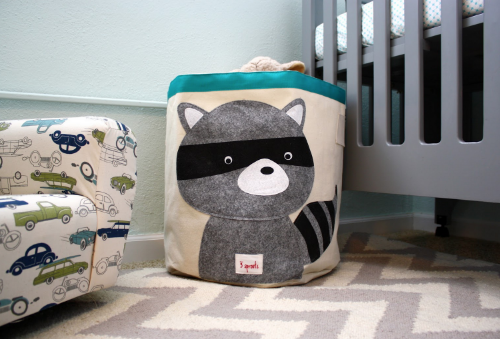
Storage bin

We’ve used this bin for blankets and sleeping sacks first and now it’s become a toys bin. You can use it however you want, I just thought I’d share with everyone because they’re super cute.

Caddie

Before she had her own room, we were using this as her toys bag so we could carry it easily from room to room. Once we moved to a bigger place, this became her caddie for diapers, diaper cream, etc. it’s super cute and practical.

Stroller winter baby bag 

If you live in a city with cold weather, having a good winter baby bag for the stroller is a must. We have a Uppababy Vista stroller and got the JJ Cole Collections bundleme bags, they fit most stroller brands and are cozy and soft.

Winter gloves (For you) 

This is such a clever product. They’re attached to the stroller handle so it’s easy to slip your hands in and out of them. I normally never use gloves because of the inconvenience of having to take them off when you need to touch your baby or answer the phone. But these gloves are awesome, my husband loves them too!

6 months +

6 months was a big milestone for our daughter. Once she was able to sit up by herself things started to change really fast. She then transitioned to being on all fours and started crawling… Being on the move is whole different story! She was more active and wanted to explore everything around her so we had to rethink how to create an environment where she can freely explore things without getting injured.

Mat - Playspot

When our baby started to crawl a bit, she really didn’t move throughout the whole apartment. She stayed within one area where she was trying to be on all fours and discover what she could do. There was a lot of drooling happening everywhere as well. We looked for something soft and easy to clean, but also fun to look at (again, think about being on all fours for a long time, wouldn’t you want to see something fun?). We found a cool mat from Skiphop. They make fun and cool looking stuff for kids!

Food

Once they start eating real food, you’ll need to buy a whole new set of things. I really wanted to make homemade food for our baby so my suggestions are based with that goal in mind.


Eating chair

We got the Stokke Tripp Trapp because it’s a beautiful piece of furniture and it grows with your baby. It goes from a baby eating chair to to a full size chair. It’s a great investment because we’ll use it until she’s a big girl.

Baby food maker

A friend of mine refers to this appliance as the “robot” because it’s so easy to use that it pretty much feels like you have a little robot in your kitchen. It steam cooks, blends and reheats all-in-one, in 15 minutes or less. Super easy to use, perfect for cooking vegetables and blending them when they first start eating. I would normally cook some veggies, puree some fruit, put them in small containers and save them in the fridge for the next few days.

Food containers

These are great containers to store baby food as well as for taking out. Skiphop makes this cool kit of 14 containers that can be snapped together. If you want to take them with you, just put them in the insulated cooler bag that comes with the kit and the freezer pack to keep things cool.

Plastic bib

It can get messy when your baby starts eating. We found these fun animal shaped silicone bibs for her. They’re great because any spills go directly into the pocket and it’s really easy to clean.

First spoon - Spuni

Our dear friend Karen gave us this well designed, good looking baby spoons. They're not only cool looking, they're just well thought out. The size is perfect for when babies start to eat, and it just works well.

To-go dispenser (for cereal, finger food, formula)

I remember seeing my older cousins use this container when I was a kid and always thought they were genius. And they are! You put the correct amount of baby formula you’ll need in each container, stack them and you’re ready to go. One of the lids is shaped as a bottle top so it’s easy to pour the powder into the bottle. I also use some of the containers for finger food like cereal, etc.

Bottle with straw

Our little one discovered the straw and loved it right way. But man, trying to find a baby cup with a straw was not an easy task. Most of them come with some sort of strange method to suck, like needing to bite and suck at the same time in order for it to work. I tried several ones and again, found the perfect one at Skiphop. Simple, straightforward (like any regular cup with a straw) with the ability to close it so it doesn’t leak. They also have cute designs to pick from.

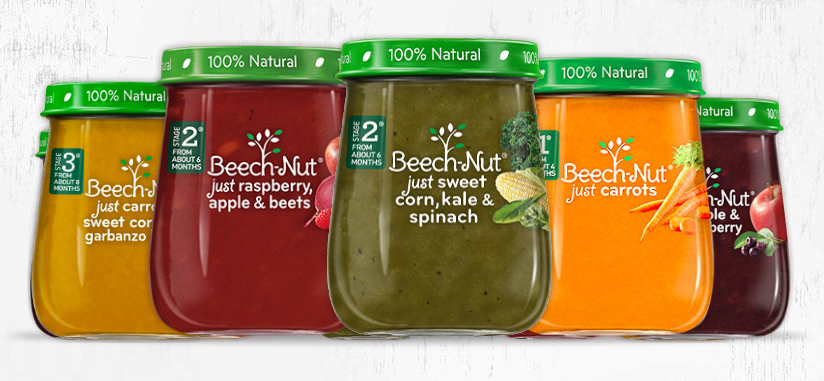
Baby food - Beechnut

It’s hard to have homemade food when travelling so we researched a few baby food brands to see which one was “less bad”. A friend recommended Beechnut to my husband while we were travelling, we bought it and our daughter loved it (I tried it too and it is pretty good). They have simple combinations and more creative ones, all very tasty!

Teething: Sophie the giraffe

Yes yes, you’ve heard about the famous Sophie teething toy. And I have to agree, it’s great for teething. I guess it’s great because the toy has many different parts (legs, ears, head, body) to chew on so your baby will be entertained for a good chunk of time.

Books

When we first started showing books to our daughter, the best books were the ones that had one big image she could focus on at a time. The other type she really liked were the ones with baby pictures! She really liked seeing other babies (even the ones on the diaper bags!)

Global Babies  This book is one of her favorites, seeing babies from around the world 

image.jpg

Think touch learn A beautiful set of board books designed by Xavier Deneux to teach kids about colors, opposites, shapes and numbers.

image.jpg

Hanna Anderson PJs

A friend of ours gave us our first set as a present. These PJs are super easy to put on (1 zipper only) and fit our daughter perfectly. The fabric is nice and soft and the designs are pretty fun. After trying other brands, what I really like about these is the fact that the zipper goes all the way from top to bottom in one go, rather than having to close buttons all the way. It was fine to do this when she was younger and didn’t move much, but once she started rolling over and moving, the zipper is a winner.

Inflatable tub

We got this inflatable tub as a gift from my husband’s friend when Mila was born. We didn’t use until after she was able to sit up. We tried it for the first time when she was about 6 months when all of a sudden bathing became her favorite activity of the day. It’s also super practical when traveling, we took it with us for a couple of trips and made her feel more like “home” when using it. She is almost a year old now and we still bath her in it. It’s getting a bit tight but I like it because it’s cushiony at the bottom, much better than bathing her directly in the regular bathtub.

Travel stroller

We thought we wouldn’t buy 2 strollers. That’s crazy, how many strollers do we really need?

Once our baby was too big for her infant car seat, travelling with the Uppababy vista was not as convenient as we thought. It’s a sturdy stroller but the seat cannot be folded, therefore you can’t leave it at the gate when flying.

A friend recommended this new stroller called “Mountain buggy Nano”, it’s lightweight and it folds up to the size of a carry-on bag. Yes! imagine that? We are able to travel and take it with us all the way inside the plane, fold it and store it in the overhead compartment. You can’t beat that.

Besides how compact it is, it’s also comfy (it reclines so your baby can sleep well), it’s easy to control with one hand; and drives smoothly because the wheels are made of rubber.


It's so fun to witness how a new little person discovers the world. I hope these tips help you and your little one enjoy every milestone during their first year...Enjoy every bit of it!


UX I love doing

I've been working in the tech industry doing UX Design for about 10 years now, it's really crazy how time flies by. Back then, doing “UX” was still relatively new. A big part of our jobs was educating people about what we do: How UX could help uncover user pain points as well as unmet user needs. UX can help address these by partnering with other disciplines to create easy-to-use, simple and delightful experiences. But in order to provide a proper a solution like this, there needs to be an equal partnership among the disciplines you work with, mainly with Product Management and Engineering. The path to get there has taken a few years, but the result has been a variety of great and innovative products you can choose from today. A great example is communication. There are so many new ways to connect with people now, you can talk to the world using social media or video chat from your phone with anyone in the world, at very little cost. It's awesome! I recently connected with the host family I stayed with when I was an exchange student in high school (yes, that was a long time ago!). And that’s all because technology is being used to enhance people’s lives.

I've worked with many teams at Microsoft and now at Google. I've learned so much from each team and the product(s) we built. I wouldn't change anything I've experienced so far because it led me to where I am today. And today I am so proud and happy to be part of the Education team at Google. It’s always been my goal to work on a project where technology ‘improves peoples lives", and this is my chance to do so.

The main product I work on, Classroom, was entirely designed based on user needs. A team of people passionate about education got together to understand the issues teachers and students are experiencing today. It’s an area where technology really hasn't put a lot of effort in. Unlike other areas like communication or social media, education really hasn't experienced the explosion of amazing solutions.

We did a lot of research and found out that teachers are spending a lot of time hacking technology in order to use it in their classrooms. How is it possible that we can facetime with anyone in the world, but teachers still have to spend hours in front of a copy machine? In this age of technology, this doesn't make sense at all.

We started thinking of ways we could address this and other existing pain points. What if we started by creating a space where they could do everything they do today, just more efficiently? This way teachers could focus on the important part, teaching...and not tech-ing.

It's been a humbling experience to design hand-in-hand with teachers and students, learning directly from their experiences using the product. We had an amazing set of "testers" who piloted our work since the beginning. We are their biggest fans. It's such a rewarding feeling when you demo the product and a teacher gives you a hug because they're so happy about it. That’s when you know the user-centered design process really nailed it. It’s great for our users because companies are creating more and more products based on their needs. I am excited to see what technology will do for Education in the next few years.

If you are a Google Apps for Education school you can use Google Classroom right away and it's all for free! No ads either. Check it out here: Google Classroom

Meet the team

Here's an overview demo of Google Classroom:


Baby tips: what I learn about my pregnancy and baby so far

As a first time mom I had no idea what to expect during my pregnancy. Of course I had no idea what things were needed when the baby arrived either. I asked family and friends for their advice since there’s no better way to learn but from those who have gone through it themselves. I’ve been collecting their advice in many forms (emails, google docs, notes, etc). Now that our baby is 5 weeks old and we have a good rhythm at home, I decided it’d be nice to share the love with all the pregnant ladies out there. Here’s a summary of all the advice I collected plus my own experience so far:


During your pregnancy

I’m sure you will hear all sorts of things about what to expect during your pregnancy. Everything from what the shape of your belly means to the best way to deliver, or things you should and shouldn't eat, etc. All I know is that every pregnancy is different and we all feel different throughout our pregnancies.

Products

I only want to recommend 2 things that made me feel much better and think it could apply to most pregnant women:

Use a stretch mark cream from the beginning of your pregnancy until a few weeks after you deliver. There are tons and tons of types out there. To be honest, after all the different suggestions people sent me I think it’s all about personal taste. I ended up using Mama Mio because I love the smell, it’s not too strong which was perfect because my sense of smell was heightened during my pregnancy. I used 2 products:

Mama mio Tummy Rub stretch oil

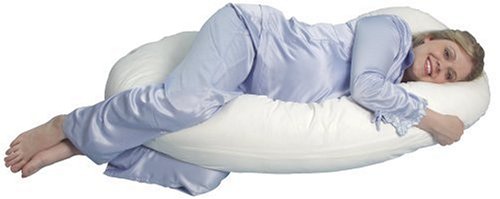
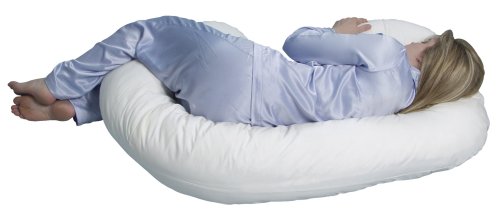
Once your belly grows and it starts to get a bit uncomfortable to sleep, get a body pillow. I thought it wouldn’t make a difference and wouldn’t need it but oh my god, when I got it I just fell in love with it! Once your belly is bigger you won’t be able to sleep on your back and having something to “hug” while you sleep on your side makes a world of difference. I got this one from amazon, but I’m sure there are plenty others you can buy. Pick the one you like! 

Body Pillow from Amazon

Classes

My friend Bea recommended taking some classes to be prepared before the baby arrives. If you’re not planning on delivering all natural (no epidural) there’s no need to take Lamaze classes. I wasn’t planning on skipping the epidural so I didn’t take it. These are the classes we took:

- How to take care of a newborn

- Breastfeeding

- Infant CPR

These classes gave us a good overview of what to do as new parents and god forbid be prepared in case we need to do CPR. Most of these classes are offered at hospitals or pediatrician's offices.

We also took a "Preparation for childbirth" class which gave us a very detailed overview of the different signs of labor, showed us all the different scenarios of things that could happen and even videos of different labors. It was too much information for my taste, I ended up thinking all the possible bad scenarios would happen to me. I would've much rather not know all of these. So it’s up to you, take it if you are the type of person who wants to be super well informed.

She also recommended getting the “Happiest baby on the block” DVD. The DVD is better than the book because it is fastest and you can see the techniques on video. It will teach you how to soothe a newborn, the techniques are great and work like magic!

App

The “Pregnancy Today” app from Baby Center gives you a great day by day, week by week overview of your pregnancy. I learned a lot about the baby’s development as well as symptoms I may have. My pregnancy was by the book, I really got a lot of the symptoms exactly when the app said I would.

Books

I ended up having tons of pregnancy and how-to-raise-a-child books from friends and family. In all honesty, I haven’t read them all because I didn’t want to be too biased on certain methods. More than pregnancy books I will recommend a few books for when the baby arrives. The book I use a lot is "The new basics" by Michel Cohen.  I like his philosophy and we go to his practice. What I like about this book is that its like an encyclopedia, you look for the topic you're interested about and go read about it. No need to read it chapter by chapter.

Other books like this are Baby 411 and Babypedia from Germany.


Once the baby arrives

Sleeping during the first few months

We heard many suggestions and thoughts on the best thing to use for the first few months, whether it should be a mini crib, bassinet, co-sleeper, etc. We ended up getting this amazing rocker/sleeper form Fisher-price which we absolutely LOVE. 

Our baby has been sleeping on it since she was born. It’s perfect because it fits anywhere and it’s easy to move around the house. I have her next to my side of the bed at night, she’s snug and because the rocker is slightly slanted I have peace of mind that if she spits there’s no risk of choking. We also got a regular crib which we’ll use once she is a bit bigger.

Fisher-price Rock and Play Sleeper

Crib

We wanted to make sure we got a safe crib for our baby so we did a lot of research online and with friends. In turns out there are government safety standards for cribs which all companies in the US have to follow. So, no matter what crib you buy, it has to comply with these standards. That said, it’s up to you how much you want to spend on material, color, style, etc. After talking to many friends and looking in stores, we decided to buy the Ikea crib. It’s cheaper, well made and meets all the safety standards. This is the one we got:

Ikea Sundvik Crib

Mattress

Everybody suggested getting a foam, firm, organic mattress. Here are the top 3 mattresses mostly recommended from cheaper to expensive:

Sealy Soybean foam mattress Size: 51.6 x 27.2 x 5in

Moonlight Slumber Little Dreamer Dual Firmness All Foam Crib Mattress Size: 52 x 27.5 x 5in

Naturepedic organic cotton no compromise Size: 52 x 27.8 x 6in

You should also get a waterproof fitted crib pad to protect the mattress from getting wet. This is the one we got from Naturpedic.


Blankets

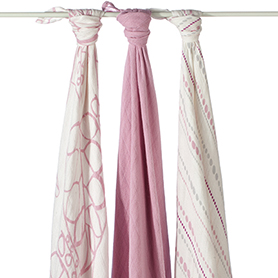
You are going to need blankets to swaddle the baby and cover her/him while sleeping and nursing. We found the Aden and Anais swaddles are the best for swaddling the baby. We especially love the Bamboo swaddles because they’re much softer, light and breathable.

Aden and Anais blankets

We also have the regular swaddles as well as wash cloths and bibs from Aden and Anais. You won’t go wrong with this brand, it is really nice. In general I’m using their blankets as nursing cover, stroller blanket, swaddle blanket, etc.

There is a big market around ready-to-swaddle sacks/blankets. We got many of them but haven’t used them yet. For some reason we found that swaddling our baby with a regular blanket worked better than with sacks.


Pacifiers

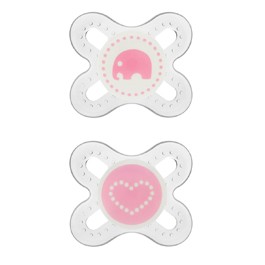
It is up to you if you want to use them or not. We totally did, it helps sooth her when she’s tired and fall asleep. We got MAM pacifiers and are working well. I’m pretty sure any brand will work well.

MAM pacifiers

Feeding

I would recommend breastfeeding if you can. I was worried I wouldn’t have milk because my mom told me she never had any therefore I shouldn’t have it either. But thankfully I do, and it’s been the most amazing experience ever. It’s fascinating how the human body works. I’ve been lucky I haven’t had much pain and it’s been working really well. The best part is the bonding experience with our baby.

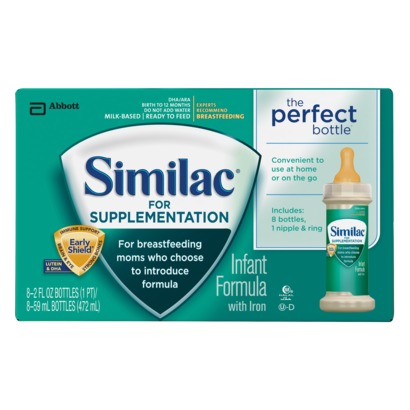
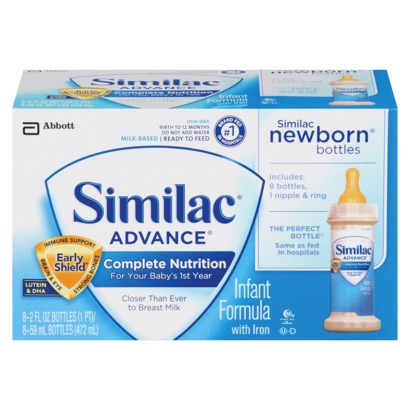
During the second and third day of breastfeeding your baby will start getting hungrier and you may not have enough milk yet. To avoid having a crying baby (which we experienced) and not knowing what to do in the middle of the night, I’d suggest getting a box of formula ready bottles just in case. It saved our lives a couple of times after breastfeeding for 2 hours and our baby was still hungry. These were also used at the hospital, they’re great because they don’t have to be heated, just open and serve. There are two types you can use:

Similac formula   Similac Supplement to go

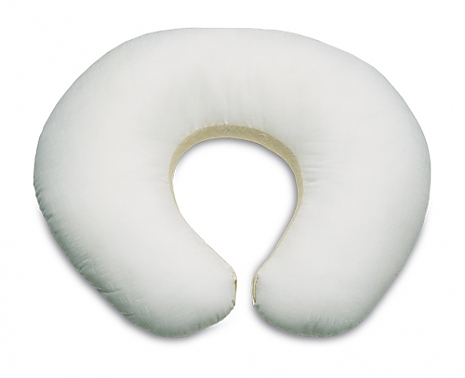
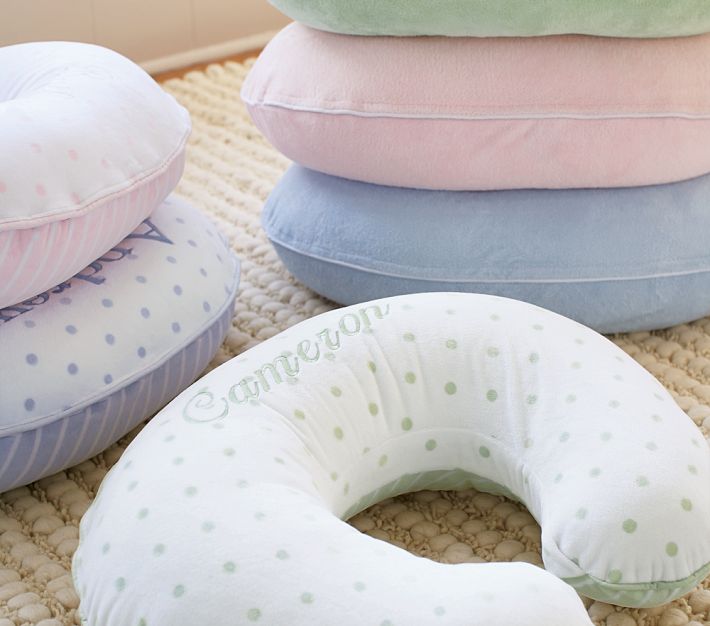
I also recommend getting a boppy pillow. It’s is super super useful when breastfeeding. It will let you have your hands free while the baby feeds. And your arms won’t be sore either. I think the size is a standard one so you can get nice covers anywhere. I bought a couple of chamois covers at Pottery Barn Kids, they’re super soft and cozy for the winter.

With regards to breast pumps, everyone recommended Medela pump double and electric. I got it and so far it’s been working well. It’s easy to use and pumps fast!

When you pump you’ll need to have bottles to store milk in the fridge/freezer. Medela's pump comes with a few of them but I recommend buying extra storage bottles because you’ll need some to store milk and for pumping.

Medela Pump Double and Electric

With regards to bottles, you’ll only need 5 oz bottles at the beginning. We got Dr Brown bottles. They’re great because they’re designed to not let so much air in when drinking. That said, my friends say babies will get used to any bottle you give them unless the baby is colicky so get whichever you think it’s best for you.

Dr. Brown bottles

Get a bottle warmer, this will become quite handy to warm up bottles in the middle of the night or even baby food jars. We got Dr. Brown's bottle warmer, so far we’re using to thaw breast milk.

Dr Brown bottle warmer

Do not get a bottle sterilizer, a dishwasher does the same job. That said, if you breastfeed you’ll need to sterilize all the pumping parts after each usage. Right now we’re boiling them since I’m not pumping everyday, but we might get one if I have to pump more often.

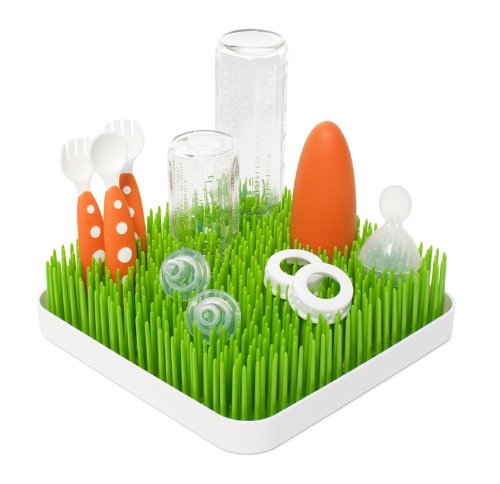
My friend Addy got us this super cute drying rack that looks like a square patch of grass with flowers. We use it to dry pumping bottles, accessories, baby bottles, pacifiers, etc The flowers are great to hold smaller parts.The whole thing looks so pretty on the countertop!

Boon Grass and Flowers

Burp clothes

Get plenty of burp clothes, you can never have enough of these!! We’re using them for burping and cleaning her while giving her either a sponge or tub bath. You can use them for anything you can think of. These type are great, small or large towel like burp cloths (any brand works):

Burp clothes

Bathing

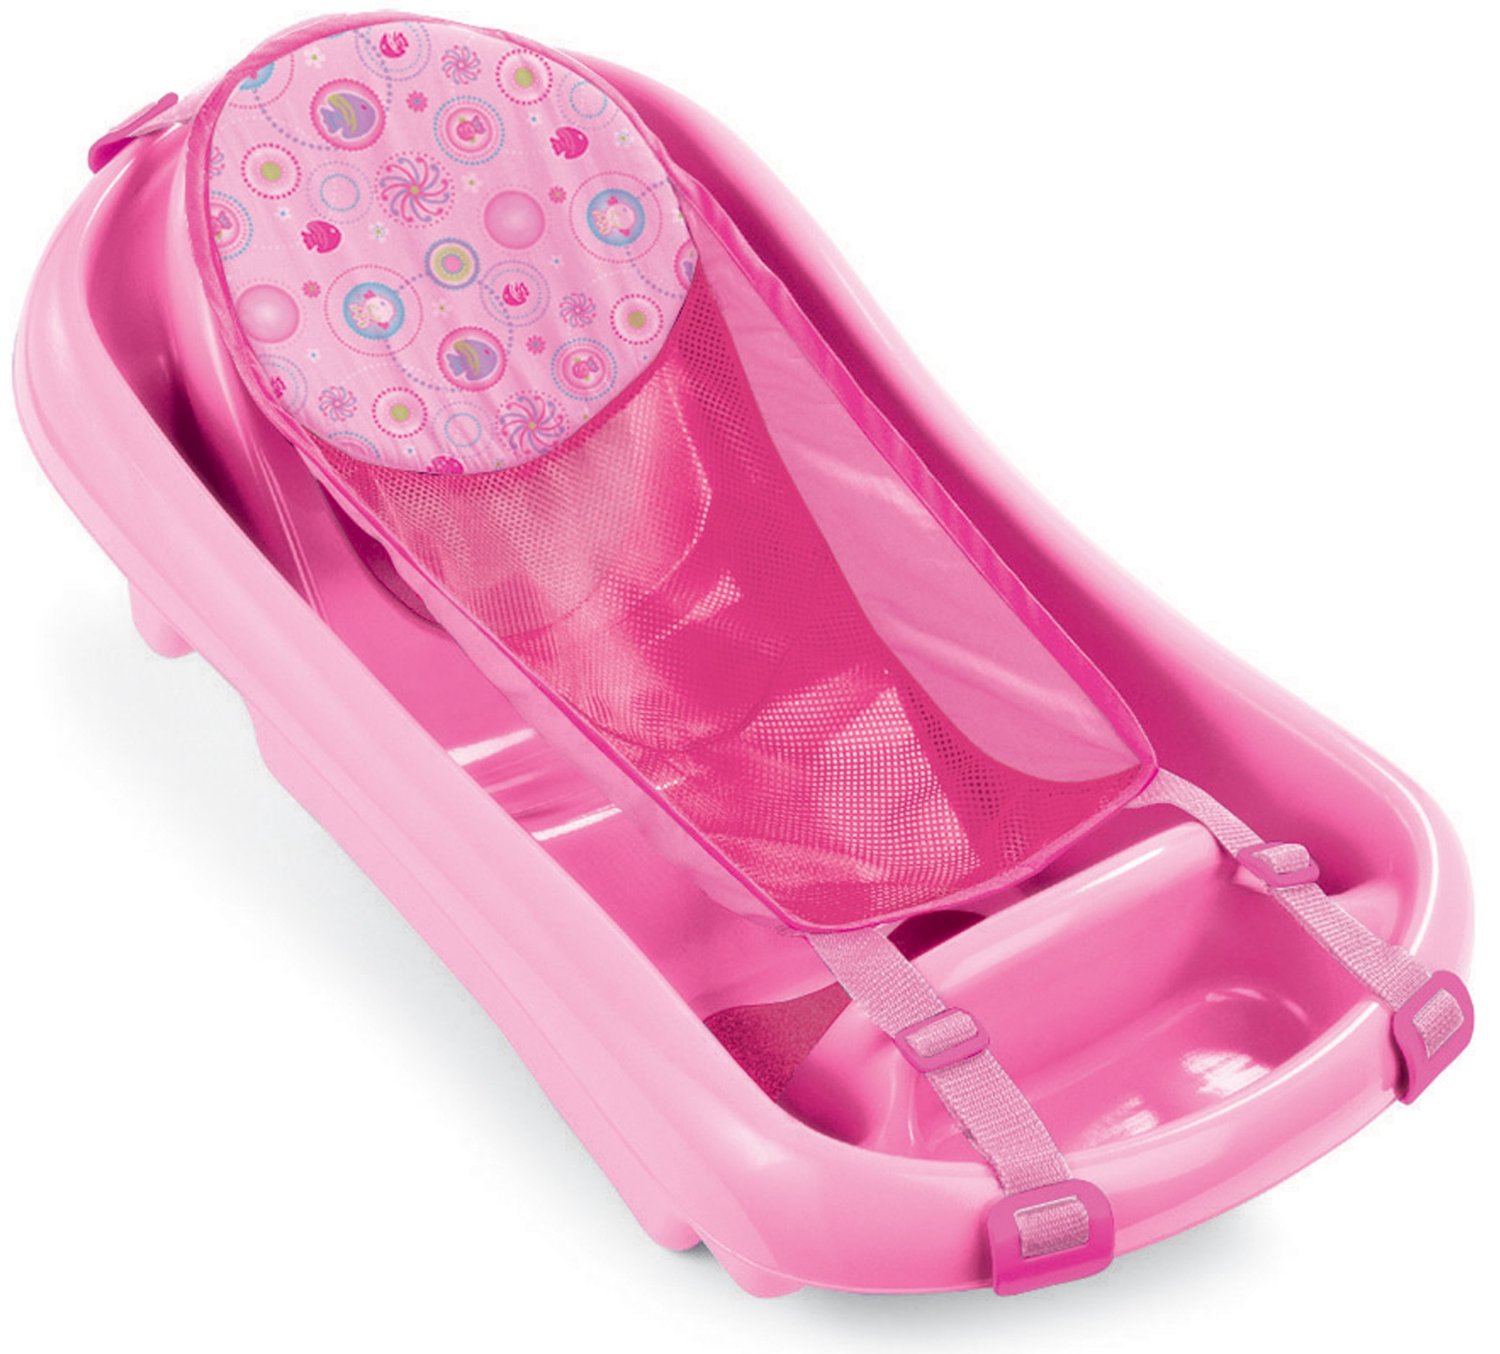
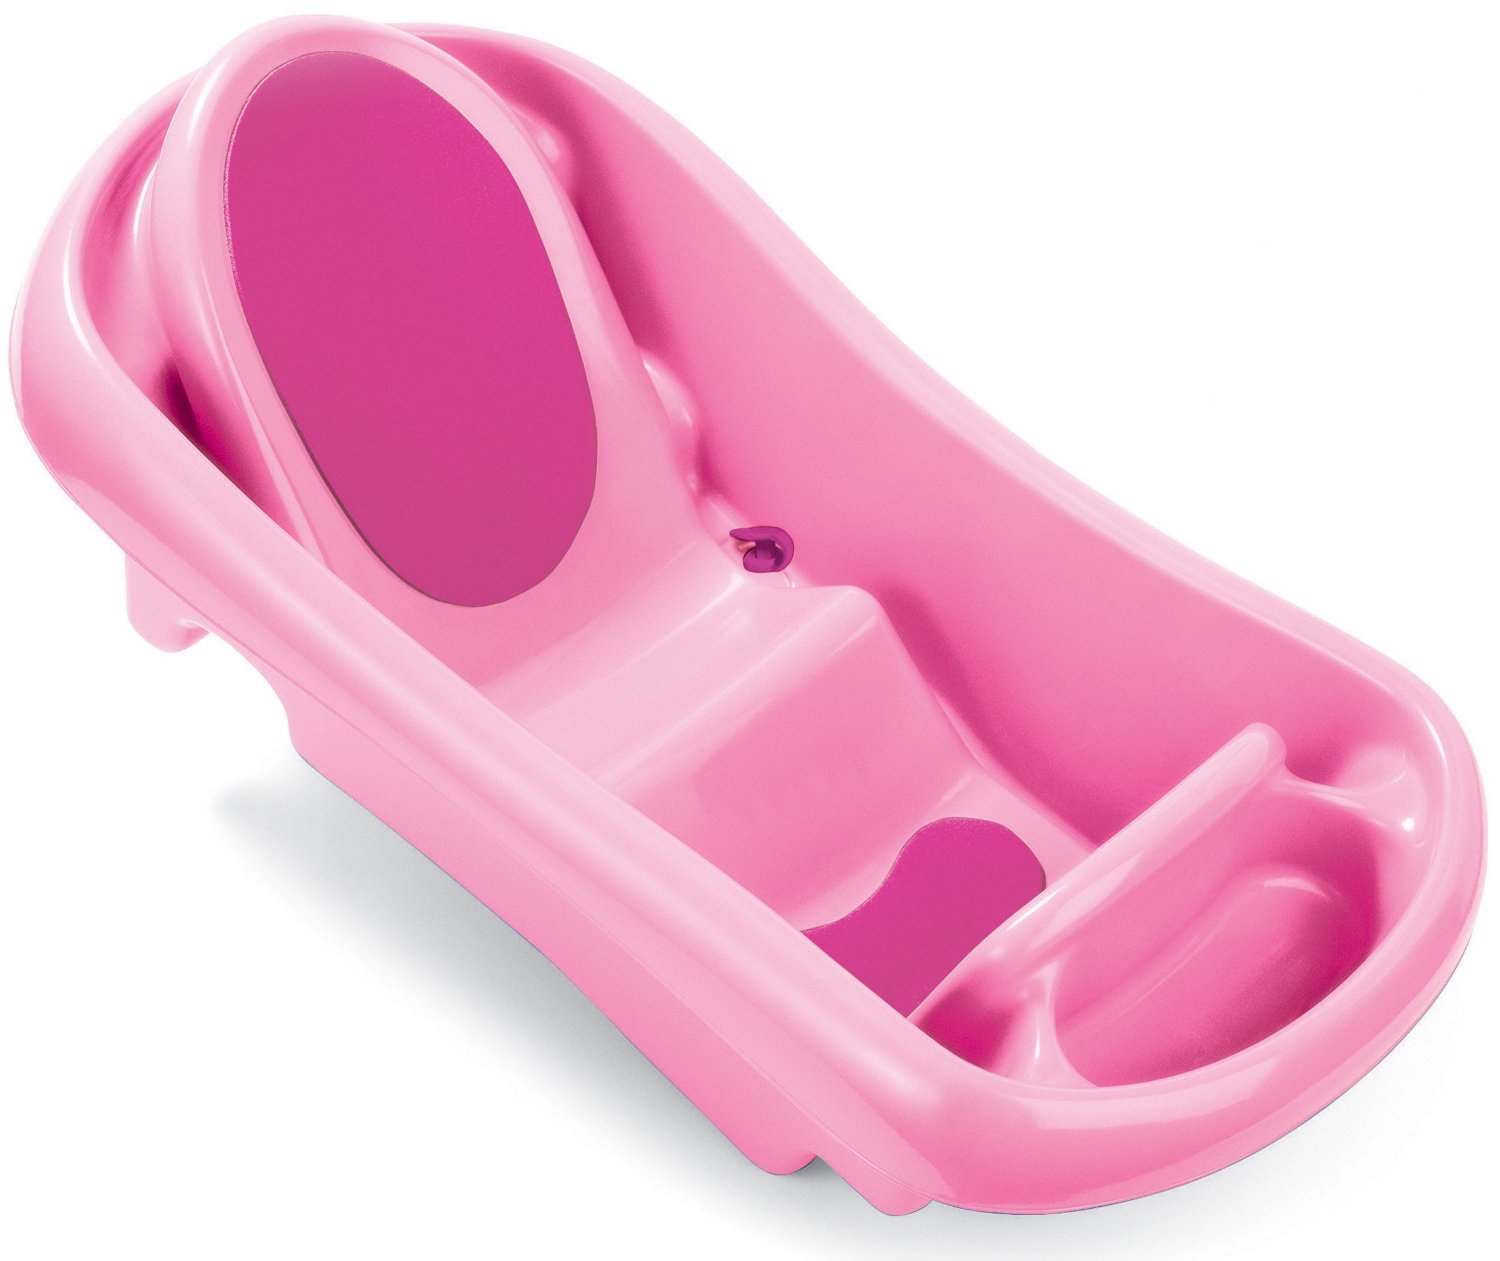
We only gave our baby sponge baths during the first 2-3 weeks because we needed to wait for her umbilical cord to fall off. We were also a bit nervous of bathing her when she was so tiny. Plus the Dr said it’s not necessary to bathe her that often. We started bathing her in a baby tub a couple of weeks ago, we do it twice a week. My sister recommended this tub which has a sling to hold the baby. This tub is great because I can place her on the sling while washing her and don’t need to hold her all the time. The sitting up design will be very helpful when she can sit on her own.

Our baby loves the water (like her mom!) and is enjoying her baths every time!

The first years Infant to Toddler tub

We are not using any soap yet. Just water. Again, get plenty of wash clothes (or burp clothes, they’re pretty much the same) to clean her. My cousin told me about this trick to keep her warm: Place one wet washcloth on her belly while you bathe her to keep her warm because the tub should only be filled with enough water to cover her bottoms (watch video below). Make sure you constantly refresh it with warm water so she’s always warm. In terms of towels, one or two will do the job. You won’t need to buy that many towels. Use your elbow to test how hot the water is, I learned that from my BabyCenter app. Here’s the video I watched:

A friend of ours gave us a Mustela kit with baby shampoo, wash and diaper cream. We tried their shampoo a couple of times when giving her sponge baths, it felt nice and mild.

Mustela Dermo-Cleansing

We also use Mustela’s Physio bebe lotion to clean her diaper area when she has a major poop incident. It’s nice, you don’t need to rinse it and it’s very mild.

Mustela Physio Bebe lotion

Diapers

It’s up to you whether to go disposable or cloth diapering, we are as most of my friends and family; a disposable family. We live in NYC and don’t have a laundry unit in our apartment, plus to be honest the last thing I want to do is wash poopy diapers every day considering we change diapers between 8-10 times a day!

Everyone recommended using Pampers swaddlers. Only buy one newborn size package, it will last for one week approximately. By then the baby will outgrow them and you’ll need size 1.

Pampers Swaddlers

In terms of diaper creams, everyone recommended Densitin (blue box). Addy recommended Triple Paste Diaper cream. Both look very thick and white. I assume these will be good once the baby is a bit older because so far we’ve been using A&D ointment, same as the one they used at the hospital. We really like it, it’s smooth and not too thick for the baby’s skin.

A+D Ointment

A few friends recommended getting a diaper pail to keep all the dirty diapers contained and not have a stinky room. We didn't buy one because we have a chute right outside our apartment. We take our trash every day and so far it hasn’t been stinky! You may need a diaper pail depending on how often you can get rid of trash.

Changing table

We thought a lot about how to accommodate a changing table in a small NYC apartment. In the end, what you need is a flat surface where you can place a changing pad and have room to store diapers, wipes and diaper cream within reach. We ended up placing the changing pad on top of a regular dresser. We have a diaper caddy hanging off from the side to store diapers, wipes and diaper cream. This diaper caddy is super useful:

Prince Lionheart Diaper caddy

Get at least 2 or 3 changing pad covers. You’ll be surprised how many times your baby will spit or pee/poo while you’re changing her/him!

Baby wipes

We got Pampers sensitive wipes. I don't know what's in it but so far we haven't had the need for a wipe warmer (and it’s getting pretty cold in NYC). Buy them in bulk to save some money. We subscribed to a monthly delivery of a 7 set pack on Amazon. We’re saving lots of money since 1 of them at the drugstore is aprox $6 or $7!!

Pampers sensitive wipes

You will definitely need a good portable changing pad. Skip Hop makes the best ones.

Skiphop portable changing pad

Clothes

I think we all get so excited about our baby’s arrival we tend to buy tons of cute but not practical clothes. During the first couple of weeks at home you’ll need something easy to put on and that won’t brush against the umbilical cord, which falls off aprox within 2 weeks. The best outfit is the kimono fold top (side snap shirt) because you won’t need to change the shirt by going over the baby’s head. 

I’d put this on with pants and a one piece outfit on top (this would vary depending on the weather of course). Get a few of them, you’ll be changing them constantly since there will be tons of spitting and pooping.

Onsies are good too but I started using them after her umbilical cord fell off.

Side snap tops (Gerber) (any brand works)

Strollers, car seats

No matter where you live, you’ll need to have a car seat to leave the hospital. Lots of people recommended Graco's car seat which has great reviews. We ended up getting Per Perego's Primo Viaggio Sip 30/30. I went to the store to compare them and really notice the difference in material, sturdiness and safety. To me, the Per Perego felt like a Mercedes next to a Honda. Both work but one felt safer, sturdier and better looking :)

Per Perego Primo Viaggio Sip 30/30

Living in NYC, having a good stroller is everything. We don’t have a car, so we walk and need a great stroller that can handle all sorts of “terrain” (cobble streets, patchy sidewalks, etc). For us, sturdiness and good storage room were our must haves. Easy to fold was important but not as it is when having a car because we really don’t fold it often. With that in mind, our top choice was the Uppababy Vista. We absolutely love it. It comes with a seat and a bassinet. As of now we’ve only used the bassinet so our baby can sleep comfortably. She loves the stroller, she falls asleep as soon as we lay her on it.

Make sure the stroller you buy is compatible with the car seat you get. Uppababy has adaptors for multiple car seat brands which was great because we got to pick the our top choices for both.

Uppababy Vista

Baby carrier

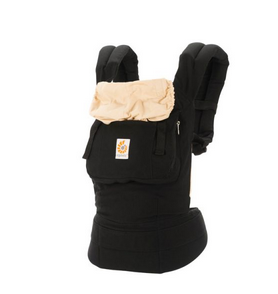
Get a sling or baby carrier to carry your baby from birth. We use ours all the time. We tried Bjorn's Miracle carrier and though it works well, it’s a bit bulky and takes a lot of room to store. It also has all these straps hanging and doesn’t look very good. We now have the Ergo baby carrier which is soft, has a pocket in front where you can put keys, your wallet or a burpy cloth (believe me, the pocket comes in very handy!) and it’s not bulky so you can fold it and take it with you if you travel.

Ergobaby carrier

I just got a wrap/sling from Baby K'tan. It's perfect to hold the baby close to you, all snug. I was mainly concerned with figuring out how to carry our daughter on the plane since we'llbe traveling soon. This wrap is awesome. I already tried it with her at home and she loves it! She falls asleep immediately. I can easily move around with her. Unlike a regular carrier, this wrap lets me carry her in the kangaroo position, perfect for sleeping.

Baby K'tan wrap

Safety 1st nail clippers

My friend Addy sent us a “baby survival kit box" which included many of the things listed above. One of the items were this nail clippers which are fantastic! I don’t have the nerves to trim her nails yet so my husband has to do it. This clippers have little lights that shine onto the nail to make sure you're not getting any skin.

Safety 1st nail clippers

App

As you know, there’s an app for everything. The one thing you want help with is keeping track of feeding times, especially if you’re nursing because it’s easy to forget which side you nurse last. I tried a few apps and ended up using “Total Baby”, which I have to say that as a Designer I’m not too happy with its visuals..but it has all the features I want. I especially love the timeline view, which visualizes the baby’s feeding, diapering and sleeping times helping me find a pattern of her schedule.

Note: I’d like to create a better looking app for this as a side project. Anyone interested let me know! :)


I think that's all I have for now, hope this helps you with your pregnancy and baby once he or she arrives!!

Having a baby is the best thing in the world, it truly is a miracle. Enjoy every second of it!!!

Cinthya

Our wedding

We celebrated our wedding in Lima, Peru, my beloved home country. We were very thankful to have so many friends from all over the world come join us on this day. We live in NYC and know the effort it takes to travel to far away places, so this was truly a special occasion for us.

I wanted to post about our wedding to help other brides and grooms get some tips and inspiration as we did when planning our wedding. Here you'll find all the details of the amazing people who helped us make this happen. 

Both of us are designers working on crafting user experiences for technology products. But we were trained as graphic and print designers as well, making this a super exciting opportunity since we don't get to do print and interior design that often.

We went a bit crazy with all the elements, colors and experience we wanted to create. We definitely spent a lot of time designing every single detail from the save the date, the wedding site, invitations, place cards, favors, decor, etc. We created a "brand" with our initials y+a which we used throughout all web and print materials, as well as part of the interior design at the reception.  My next post will be about all the design elements we created and "the making of", but for now let me go into the wedding details.

It was an evening wedding, starting with a church ceremony (very traditional in Peru) followed by a wedding reception which lasted until the very early hours in the morning (also very common in Peru).  There were lots of food, drinks and dancing! 

Scroll down to take a peek at our wedding experience and the details of the people, artists and services we worked with. 


wed blog1 sm.png

Here are all the details, hope it helps!

  • Wedding site:  MohrLove.us Designed and created by us
  • Wedding dress:  Vera Wang, NYC
  • Sash and hair piece: Roxana Pardo 445 4894
  • Makeup and Hairstylist: Besso Salon Artistas y genios Juan y Miguel Barbaran
  • Flower girls dresses: Etsy Olive and Fern
  • Flowers church, reception, bouquet & boutonnieres: The Flower shop  Fiorenza Bragganini y Larissa Porraro
  • Church: Virgen del PIlar - Ana del Carmen 440 2230
  • Father: Mateo Garr mgarrsj@gmail.com
  • Choir: Arpegio  Marieli (directora) 999 234 200
  • Car: Jet set limousine
  • Reception: Jockey Club del Peru 610 3000
  • Catering, decoration: Andrea Sambra  242 4690
  • SushiHanzo
  • Hora loca (Crazy hour):  Naricitas 784 4336
  • Photographer: Esteban Nakano  999 177 761
  • DJ: Igor Carrillo 994 015 608
  • Security:  Pancho Seguridad  348 7601
  • Favors: Handmade by my amazing sister
  • Invitations, place cards, table signs, bar decor: Handmade by bride and groom

Why I love working at Google

Great video by Robert Wong, who heads the Creative Lab team at Google. As a UX Designer working at Google, this video captures a lot of the reasons why I love working in this company.  

http://www.futureofstorytelling.org In his work at the Google Creative Lab, Robert Wong never imagined he would be influencing the future of scientific development-and yet he does just that, breaking down the boundary between art and science by creating stories that inspire engineers and the technology they build.

Changing your name in NYC

I recently got married (yay!) and decided to take my husband’s last name. It was a tough decision because my heritage is Japanese, I was born and raised in Peru and now live in New York. My husband is German and also lives in NY. For me, changing my last name meant losing my heritage because I have a spanish name and my last name was the only thing that kept my “japaness-ness”. In the end, I decided to take my husband’s last name and change my middle name to my japanese name, which it’s not on any of my legal papers but everybody back at home calls me by that name.

Long story short, the last name change was easy, all I had to do was to check a box when we got married. I can use my marriage certificate to change all my legal documents. By the way, if you just did this and are wondering how to go about changing all your docs, I’d recommend using a site that helps you identify all the agencies/banks/etc you need to notify and then gather all the docs for you. All you have to do is print and mail them. 

here are some sites:

http://www.namechangeexpress.com/

https://www.missnowmrs.com/

This is all great but I also wanted to change my middle name. The legal process to change your name could be quite overwhelming. I did a lot of research and realized it was overwhelming at all.  First, I found this really great blog post that helped understand the process: http://www.legalzoom.com/name-change-guide/name-change-instructions.html

Then, I went to the the NYC Civil Court site and applied for a name change petition. It was super easy to do, and no need of lawyers

http://www.nycourts.gov/courts/nyc/civil/namechanges.shtml

Once I got the petition notarized, i went to the NYC Civil Court and submitted my paperwork. The clerk gives you a date to come back for your hearing. The hearing was easy as well, the judge asked me a few basic questions and it was done!

Then, you have to publish you new name petition to a paper. They give you different options, I picked the Irish Echo. I went to their site and applied online. I submitted my info, paid $35 and uploaded the name change petition. After a couple of hours I got a phone call from them telling me the date it will be published and where and when I should go to pick up my affidavit. 

Once you pick up the affidavit, go to the NYC Civil Court Clerk again and voila! you’re done. All you have to do is get certified copies of the name change document so you can then submit all the paperwork needed in different agencies to change your name.

I used name change express to gather all the paperwork I need. Even though the site is targeted to married couples, you can still use their service for a name change process. The only difference is to use the name change doc instead of your marriage certificate.

Hope this is helpful!